
This guide details the process of creating in your organization’s Microsoft Azure Portal an application record that allows R2 Docuo to send your emails securely through the Microsoft Graph API.
Prerequisites
- Access to the Microsoft Azure Portal.
- Credentials for an account with Global Administrator or Application Administrator privileges in your organization’s Microsoft 365 environment.
- The R2 Docuo certificate file (
.cer) downloaded from https://downloads.r2docuo.com/certificate.zip. - An account of your organization with a mailbox on your Exchange Online
Mailing Application Registration
To register a new application in the Microsoft Azure Portal you will need to follow the steps below. You must complete all of them before configuring it in Docuo.
Access to the application registration page
- Access the Microsoft Azure Portal at https://portal.azure.com and sign in with your organization’s Microsoft 365 account administrator credentials.
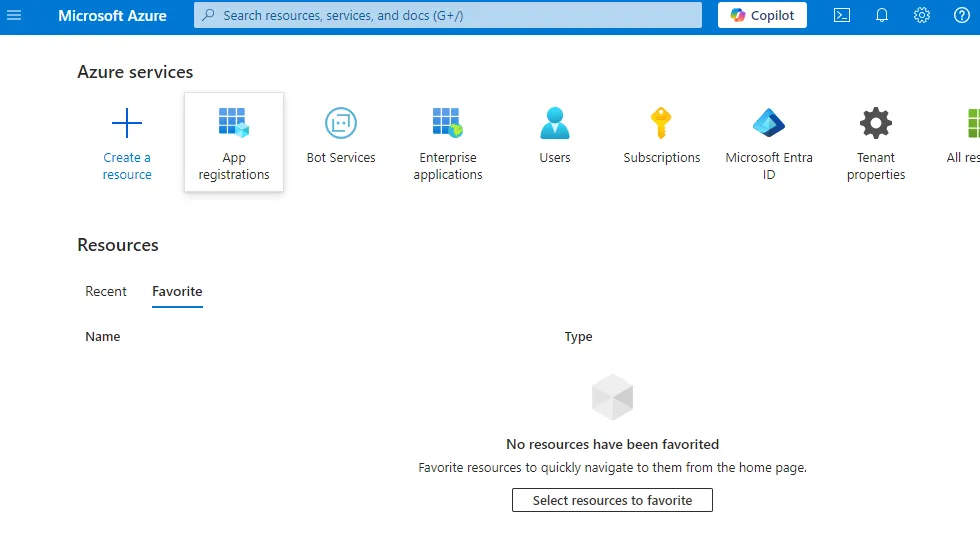
- If the App registrations option appears directly , click on it. Otherwise go to search for App registrations in the search bar, once located*,* click on the icon*.*.
Create a new application record
- Click on New Registration to create the application for R2 Docuo to access.
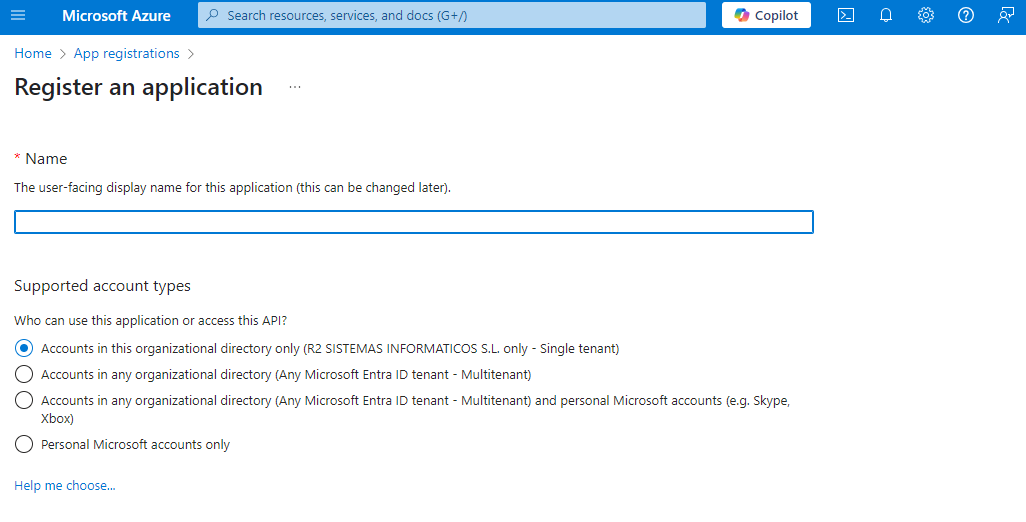
- Enter a name that makes it clear what the application will be used for, e.g. “Application for sending mails from R2 Docuo”.
- Under Supported account types, click Only accounts in this organizational directory (your company name).
- Click on Register. The new application page will open:
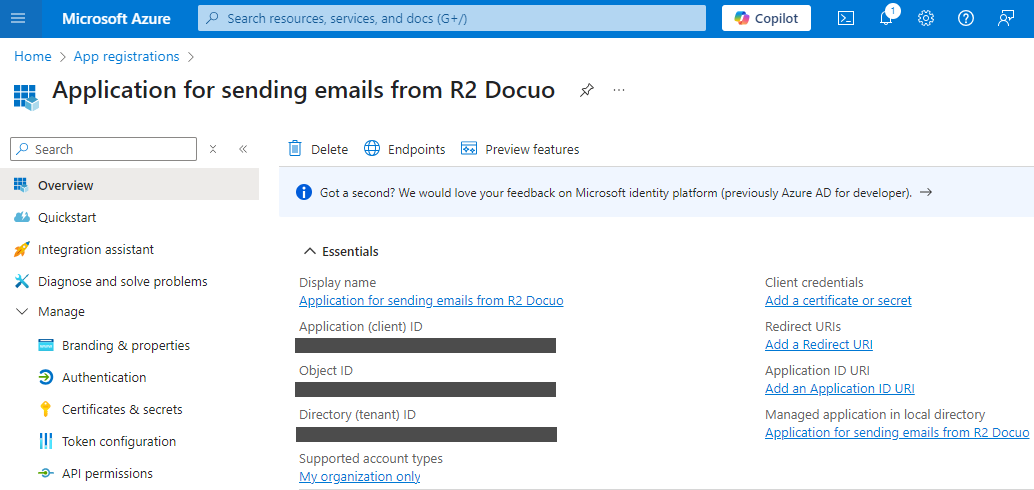
- Copy and save the value of the de Application ID (customer) y Directory ID (tenant) . Which you will need to enter in the mailing configuration in R2 Docuo later on.
Certificate of access
- Download R2 Docuo certificate file (public key) from the following URL: https://downloads.r2docuo.com/certificate.zip
- Unzip the ZIP file and save r2docuo.cer to your hard disk.
- In the application we have created in the Azure portal Click on Certificates and secrets, select the Certificates tab on the right and click on Upload certificate.
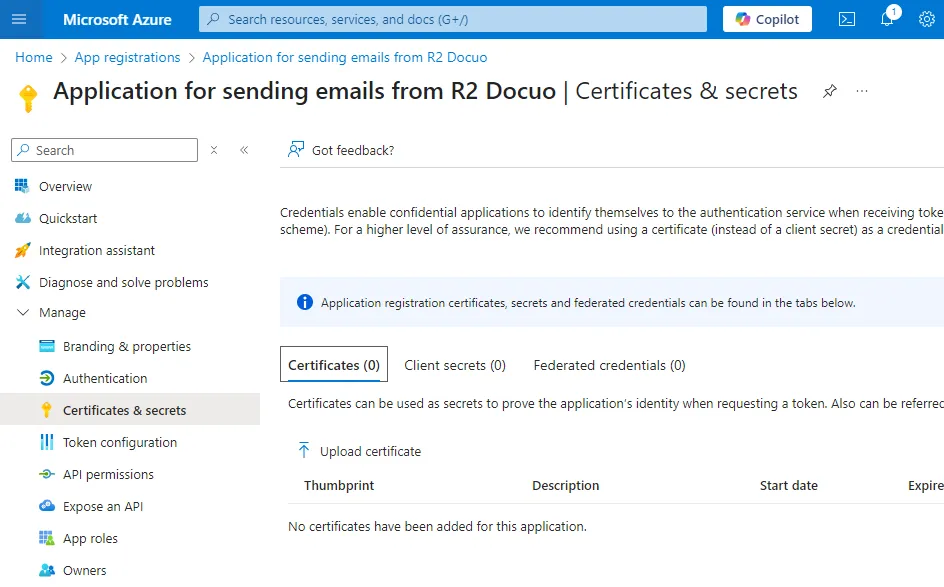
- Select the certificate file r2docuo.cer from your hard disk.
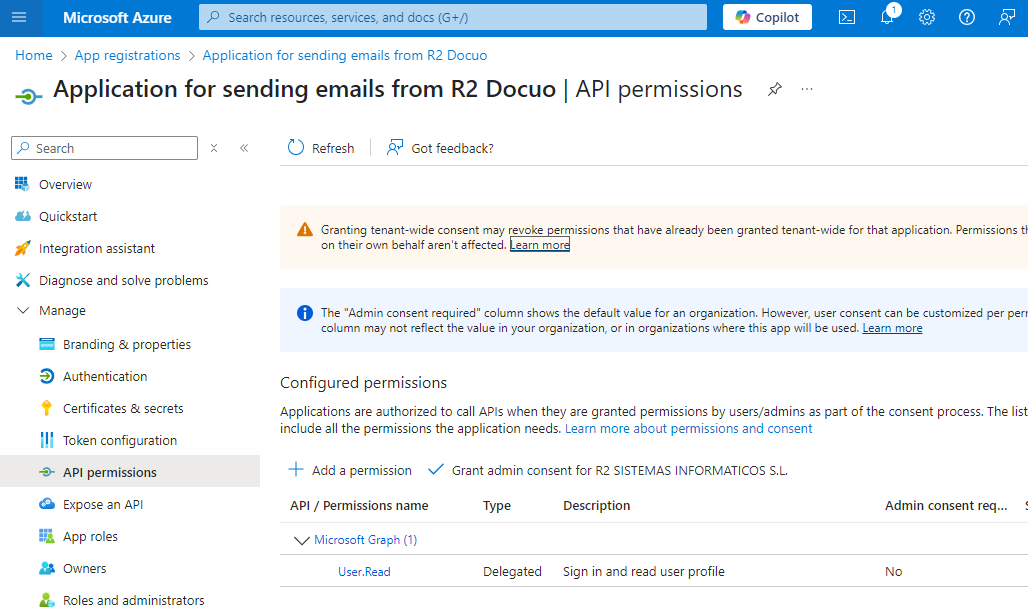
Grant permissions to the application
- Now we are going to define the permissions of your application, click on API Permissions and then on Add a Permission
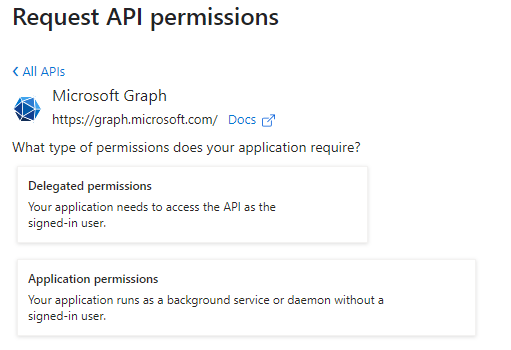
- Search and click on the Microsoft Graph option

- Now click on Application Permissions
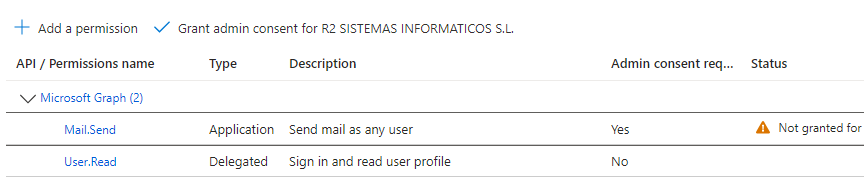
- Enter Mail.Send in the search box. Once found mark it in the list.

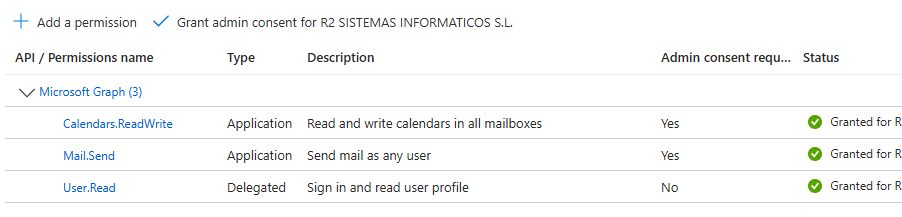
- Click on Add permissions. By default, the new permission, Mail.Send, appears in your permissions list with the status Not Granted.
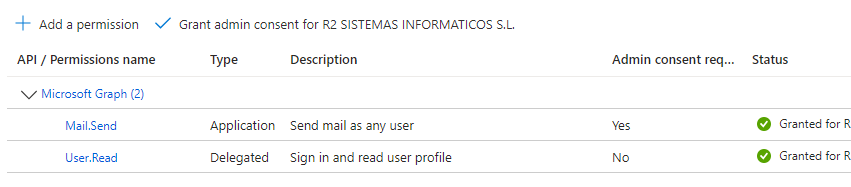
- You must grant consent with the Grant button located on the list toolbar*.* If successful, the permission will appear like this:
- Now we need to add another permission to be able to create calendar events. Click again on Add permissions. We go back to choose Application permission and in the search engine we search for Calendars.ReadWrite. We grant permissions again and if everything is correct the permissions will be as follows:
Docuo mailing configuration
- You must access your R2 Docuo account at https://myaccount.r2docuo.com by entering the credentials of the R2 Docuo repository owner.
- Choose the repository from which you want to send mails through Azure and click in the Actions column on theNut button to access its configuration.

- Find the Mail Server section and click on Change mail server:

- Select the option My own mail server and choose Office 365 (Microsoft Graph) from the list.
- Enter the data with the Tenant and Customer identifiers and the name and e-mail address of the service account you wish to use for sending e-mails.
- Click on send a test mail
- If everything is correct click Save changes and your R2 Docuo repository will be configured and ready to use the specified Office 365 account to send mails.
Administrators’ Guide: Limiting Mail.Send Permission to a Specific Mailbox
This procedure ensures that an Azure application, even if it has the Mail.Send permission, can only send mail from mailboxes that are explicitly authorized.
Step 1: Identify the Client ID (ClientID) of the Application
This information must be obtained from the application registration in the customer’s Azure portal.
- The customer’s Azure portal must be accessed at(https://portal.azure.com).
- Select Azure Active Directory.
- Access App registrations.
- Search and select the application configured for the Docuo service.
- On theOverview page, copy the application (client) ID, as it will be needed later.
Step 2: Create a Mail Enabled Security Group
A group containing only the e-mail accounts authorized for sending must be created.
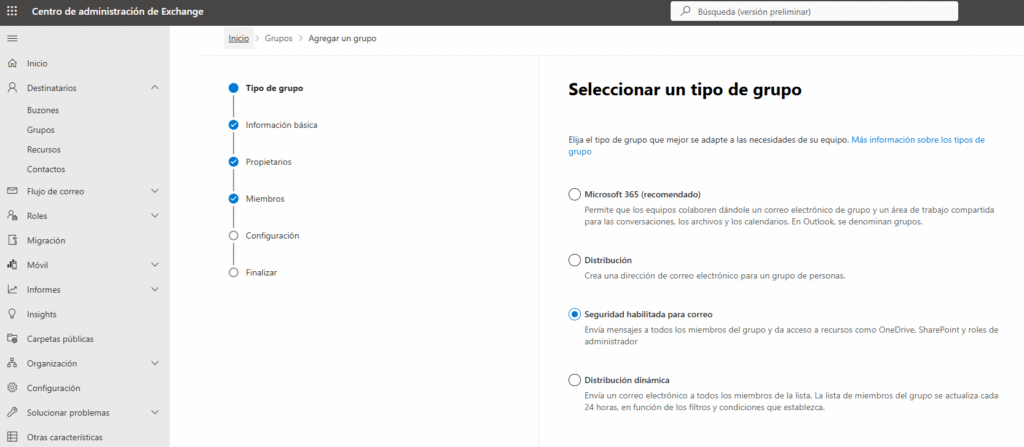
- Access the Exchange Management Center at(https://admin.exchange.microsoft.com/).
- In the menu on the left, select Groups.
- Click on Add a group.
- Choose the group type:“Security enabled for mail“.
- Group name: Assign a clear and descriptive name to the group, for example: Docuo_Mail_Senders.
- In the Members step, select Add members.
- Search and select the email account to be used for sending (for example, noresponder@tudominio.com).
- In the Setup step, define an e-mail address to identify the group, for example: docuo_mail_senders@tudominio.com
- Finalize the creation of the group.
Once this process is completed, a security group is available that explicitly defines which mailboxes have permission to send.
Step 3: Connect to Exchange Online PowerShell
The restriction policy can only be created by commands. To do this, you must connect to Exchange Online PowerShell.
- Open a PowerShell window with administrator privileges.
- Make sure that script execution is allowed using the following command: Set-ExecutionPolicy -Scope Process RemoteSigned and, if necessary, install the ExchangeOnlineManagement module.
- Connect to Exchange Online using an administrative account with the command:
Connect-ExchangeOnline -UserPrincipalName <tu_admin_email@dominio.com>. In case you are not previously authenticated, a login window will be displayed.
Step 4: Create the Application Access Policy (The Key Step)
Once the connection is established, the policy restricting application access must be created.
New-ApplicationAccessPolicy -AppId “EL_CLIENT_ID_ID_DE_LA_APP” -PolicyScopeGroupId “docuo_mail_senders@tudominio.com” -AccessRight RestrictAccess -Description “Restrict Docuo application mailing to Docuo_Mail_Senders group members only.”
Command breakdown:
-AppIdApplication ID (client) obtained in Step 1.-PolicyScopeGroupId: Email address of the security group created in Step 2.-AccessRight RestrictAccessThis is the crucial parameter. Tells Exchange that this application can only access mailboxes that are within the group specified at-PolicyScopeGroupId.-DescriptionDescription of the directive to facilitate its identification by other administrators.
Step 5: Verify the Configuration
The configuration should be verified by performing access tests:
1. Tests with a mailbox that DOES need to have access:
Test-ApplicationAccessPolicy -Identity “noresponder@tudominio.com” -AppId “EL_CLIENT_ID_DE_LA_APP” -AppId “EL_CLIENT_ID_DE_LA_APP”
The expected result is AccessCheckResult: Condedido.
2. Tests with a mailbox that should NOT have access:
Test-ApplicationAccessPolicy -Identity “otro.usuario@tudominio.com” -AppId “EL_CLIENT_ID_DE_LA_APP” -AppId “EL_CLIENT_ID_DE_LA_APP”
The expected result is AccessCheckResult: Denied.
Once these steps are completed, the application, despite having the Mail.Send permission at the Azure AD level, will be functionally restricted to send mail only from authorized mailboxes, such as envios-docuo@tudominio.com.